安装准备
下载nginx,pcre,zlib,openssl以及nginx-rtmp-module
mkdir work
cd work
wget http://nginx.org/download/nginx-1.10.3.tar.gz
wget http://zlib.net/zlib-1.2.11.tar.gz
wget https://ftp.pcre.org/pub/pcre/pcre-8.40.tar.gz
wget https://www.openssl.org/source/openssl-1.0.2k.tar.gz
wget https://github.com/arut/nginx-rtmp-module/archive/master.zip
下载完后,分别解压
tar -zxvf 文件名
unzip  master.zip
开始安装
进入nginx的解压目录执行 configure
./configure --prefix=/usr/local/nginx --with-debug --with-pcre=../pcre-8.40 --with-zlib=../zlib-1.2.11 --with-openssl=../openssl-1.0.2k --add-module=../nginx-rtmp-module-master
然后编译安装
make
make install
安装事项
安装过程中遇到报错 make不成功 报错
src/core/ngx_murmurhash.c: In function ‘ngx_murmur_hash2’:
src/core/ngx_murmurhash.c:37:11: error: this statement may fall through [-Werror=implicit-fallthrough=]
         h ^= data[2] << 16;
         ~~^~~~~~~~~~~~~~~~
src/core/ngx_murmurhash.c:38:5: note: here
     case 2:
     ^~~~
src/core/ngx_murmurhash.c:39:11: error: this statement may fall through [-Werror=implicit-fallthrough=]
         h ^= data[1] << 8;
         ~~^~~~~~~~~~~~~~~
src/core/ngx_murmurhash.c:40:5: note: here
     case 1:
     ^~~~
...
...
make: *** [build] Error 2
解决办法:
将对应的makefile文件夹中(在 /nginx/objs/Makefile) 找到 -Werrori 并去掉 在重新make即可
 原因,是将警告当成了错误处理,打开nginx解压目录下的objs/Makefile,
去掉CFLAGS中的-Werror
再重新make
-Wall 表示打开gcc的所有警告
-Werror,它要求gcc将所有的警告当成错误进行处理
报错2
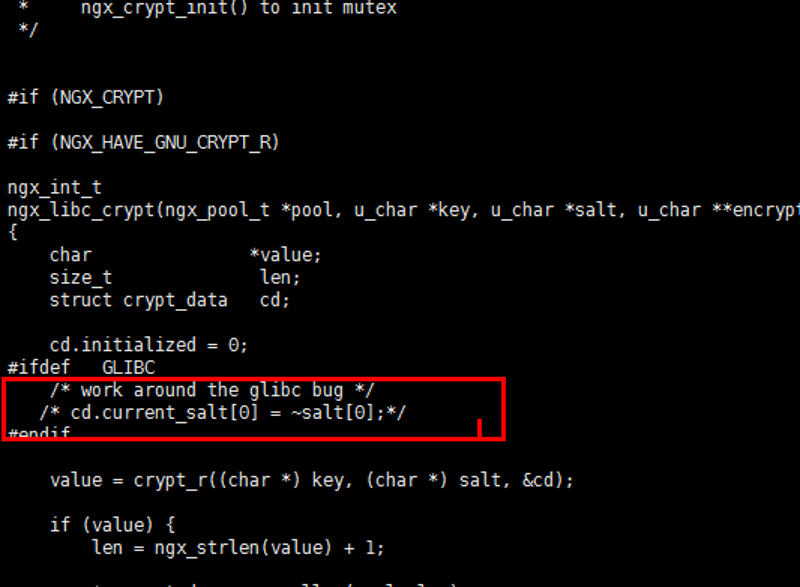
struct crypt_data’ has no member named ‘current_salt’
...
...
make: *** [build] Error 2
出现这个问题一般不是Nginx的版本高就是服务器版本高的问题 解决办法: 修改nginx安装文件夹下src/os/unix/ngx_user.c文件
vi src/os/unix/ngx_user.c

注释掉cd.current_salt[0] = ~salt[0];这行就可以
没遇到这两个错误就直接可以启动nginx测试了
安装完成
查看nginx安装信息
nginx -V
nginx version: nginx/1.10.3
built by gcc 8.3.1 20191121 (Red Hat 8.3.1-5) (GCC)
built with OpenSSL 1.0.2k  26 Jan 2017
TLS SNI support enabled
configure arguments: --prefix=/usr/local/nginx --with-debug --with-pcre=../pcre-8.40 --with-zlib=../zlib-1.2.11 --with-openssl=../openssl-1.0.2k --add-module=../nginx-rtmp-module-master
启动nginx 执行 sbin目录下 nginx
可以访问到nginx欢迎页则成功启动
配置相关rtmp服务
配置监控:把nginx-rtmp-module文件夹中的stat.xsl复制到/usr/lcoal/nginx/hls/文件夹中
监控地址:http://ip/stat
修改nginx.conf 在http外添加
rtmp {
    server {
            listen 1935;
            chunk_size 4096;

            application live {
                    live on;
                    record off;
            }
    }
}
完整配置如下
#user  nobody;
worker_processes  1;

#error_log  logs/error.log;
#error_log  logs/error.log  notice;
#error_log  logs/error.log  info;

#pid        logs/nginx.pid;


events {
    worker_connections  1024;
}

#配置rtmp服务相关
rtmp {
    server {
            listen 1935;
            chunk_size 4096;

            application live {
                    live on;
                    record off;
            }
    }
}

http {
    include       mime.types;
    default_type  application/octet-stream;

    #log_format  main  '$remote_addr - $remote_user [$time_local] "$request" '
    #                  '$status $body_bytes_sent "$http_referer" '
    #                  '"$http_user_agent" "$http_x_forwarded_for"';

    #access_log  logs/access.log  main;

    sendfile        on;
    #tcp_nopush     on;

    #keepalive_timeout  0;
    keepalive_timeout  65;

    #gzip  on;

    server {
        listen       80;
        server_name  localhost;

        #charset koi8-r;

        #access_log  logs/host.access.log  main;

	location /stat {
            rtmp_stat all;
            rtmp_stat_stylesheet stat.xsl;
        }

        location /stat.xsl {
            root /usr/local/nginx/hls/;
        }


        location / {
            root   html;
            index  index.html index.htm;
        }

        #error_page  404              /404.html;

        # redirect server error pages to the static page /50x.html
        #
        error_page   500 502 503 504  /50x.html;
        location = /50x.html {
            root   html;
        }


    }

}
重启nginx
测试
至此服务搭建算是完成了
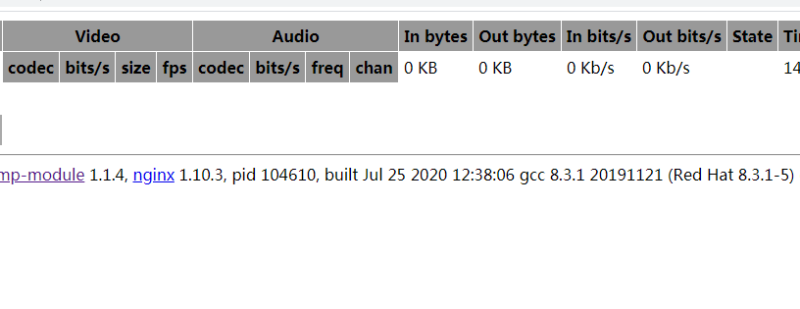
打开监控地址

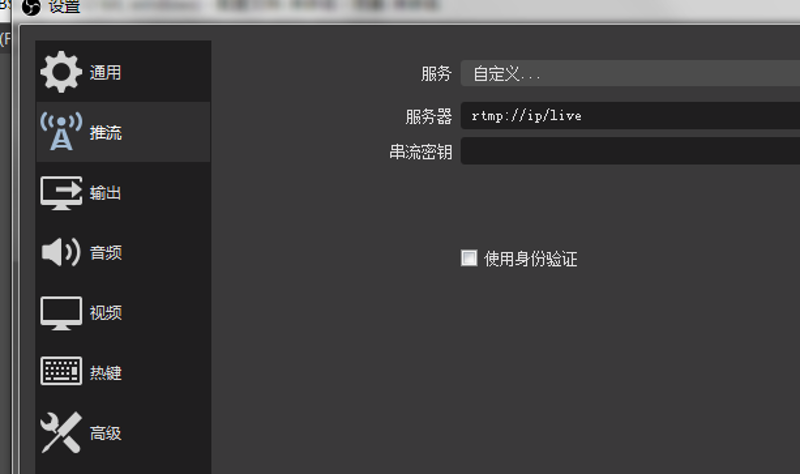
obs studio软件设置推流:

推流成功后监控页能观看到数据变化
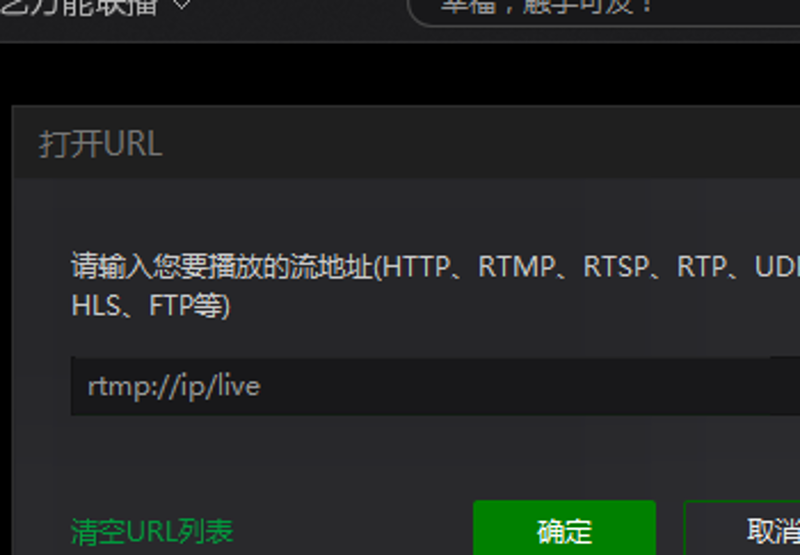
播放器拉流观看 这里用的爱奇艺万能联播 设置播放url 就可以观看


在线体验地址
configure,这一步一般用来生成 Makefile,为下一步的编译做准备,你可以通过在 configure 后加上参数来对安装进行控制,比如代码:./configure –prefix=/usr 意思是将该软件安装在 /usr 下面,执行文件就会安装在 /usr/bin (而不是默认的 /usr/local/bin),资源文件就会安装在 /usr/share(而不是默认的/usr/local/share)。同时一些软件的配置文件你可以通过指定 –sys-config= 参数进行设定。有一些软件还可以加上 –with、–enable、–without、–disable 等等参数对编译加以控制,你可以通过允许 ./configure –help 察看详细的说明帮助
注意:本文归作者所有,未经作者允许,不得转载
